Querying JPA with Querydsl. Part 1.
Introducing Querydsl
Spring Data allows creating methods following the query builder mechanism and the possibility to annotate the methods with corresponding JPQL and SQL queries (these last ones with the previously examined drawbacks). The query builder mechanism has the disadvantage of requiring the definition of methods in advance, and their names are not statically checked at compile time.
The Criteria API provides the possibility to build typesafe and portable queries using a Java API. While it solved the drawbacks of the previously presented alternatives, it ended up being extremely verbose and creating hard to read code.
Querydsl keeps the important ideas of type safety and portability. Besides them, it reduces the verbosity of Criteria API and the code it creates is much easier to read and to understand than the one built with Criteria API.
Creating a Querydsl application
We’ll start creating a Querydsl application whose dependencies are managed by Maven. We’ll examine the steps to do it, the dependencies that need to be added to the project, the entities that will be managed, and how to write queries with the help of Querydsl.
Configuring the Querydsl application
We’ll add in the Maven pom.xml file two dependencies: querydsl-jpa and querydsl-apt. querydsl-jpa is the dependency needed for using the Querydsl API inside a JPA application. querydsl-apt is a dependency needed for processing annotations from Java files before code compilation. APT stands for Annotation Processing Tool. Using it, the entities that are managed by the application will be replicated in the so-called Q-types (Q standing from “query”). This means that each entity Entity will have a corresponding QEntity that will be generated at build time, which Querydsl will use to query the database. Also, each field of the entity will be mirrored into the QEntity using the specific Querydsl classes. For example, String fields will be mirrored to StringPath fields, Long fields to NumericPath<Long> fields, Integer fields to NumericPath<Long> fields, and so on. So, the Maven pom.xml file will have the dependencies added.

The scope of the querydsl-apt dependency is chosen as provided. This means that the dependency is needed only at build time when Maven generates the previously introduced Q-types. Then, it will no longer be needed and consequently not be included in the application artifacts.
To work with Querydsl we also need to include the Maven APT plugin in the Maven pom.xml file. This plugin will take care to generate the Q-types during the build process. As we use the JPA annotations in our project, the class that effectively does this is com.querydsl.apt.jpa.JPAAnnotationProcessor.
If we were using the Hibernate API and annotations, we had to use com.querydsl.apt.hibernate.HibernateAnnotationProcessor instead. We’ll also have to indicate the output directory where the generated Q-types will reside, inside the target Maven folder. So, the pom.xml file will have this added, as in listing 2.
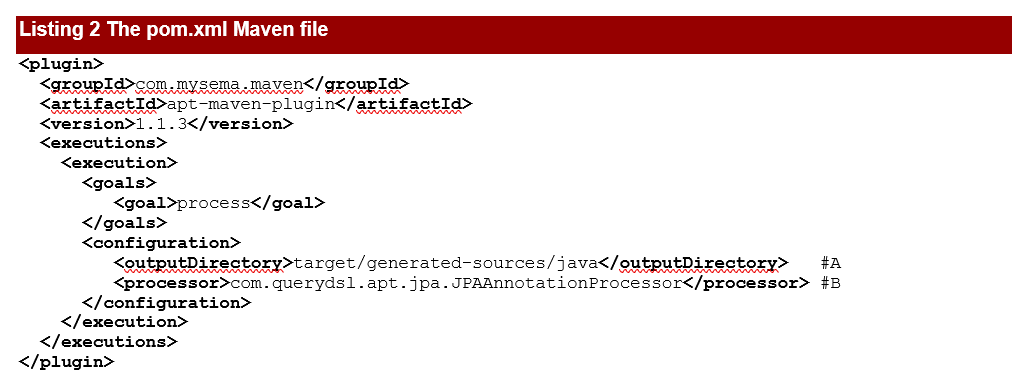
#A The generated Q-types will be located in the target/generated-sources/java folder.
#B Use the com.querydsl.apt.jpa.JPAAnnotationProcessor class to generate Q-types.
We move to the standard configuration file for persistence units, in src/main/resources/META-INF/persistence.xml. This file will look like in listing 3:
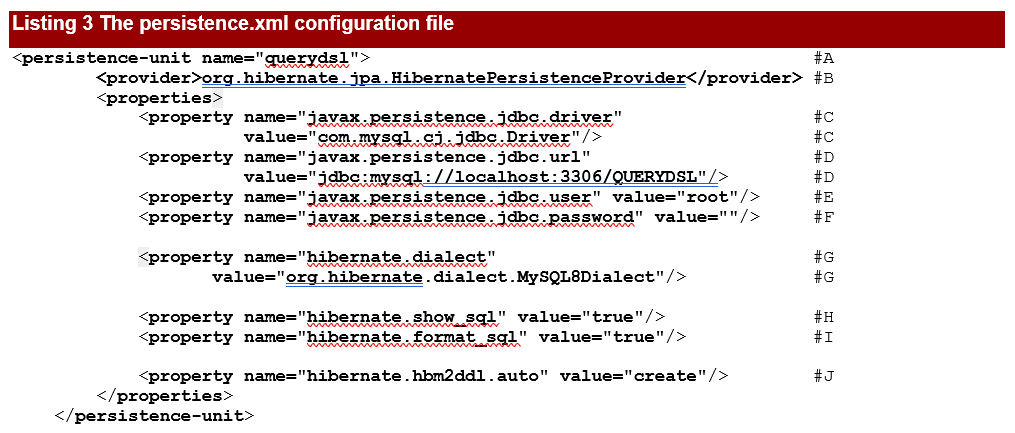
#A The persistence.xml file configures the querydsl persistence unit.
#B As JPA is only a specification, we need to indicate the vendor-specific PersistenceProvider implementation of the API. The persistence we define will be backed by a Hibernate provider.
#C The JDBC properties - the driver.
#D The URL of the database.
#E The username.
#F No password for the access. The machine we are running the programs on has MySQL 8 installed and the access credentials are the ones from persistence.xml. You should modify the credentials to correspond to the ones on your machine.
#G The Hibernate dialect is MySQL8, as the database to interact with is MySQL Release 8.0.
#H While executing, show the SQL code.
#I Hibernate will format the SQL nicely and generate comments into the SQL string so we know why Hibernate executed the SQL statement.
#J Every time the program is executed, the database will be created from scratch. This is ideal for automated testing when we want to work with a clean database for every test run.
Creating the entities
We’ll create the classes that represent the entities of the application: User, Bid, Address. The relationships between them will be of type one-to-many, many-to-one, or embedded.
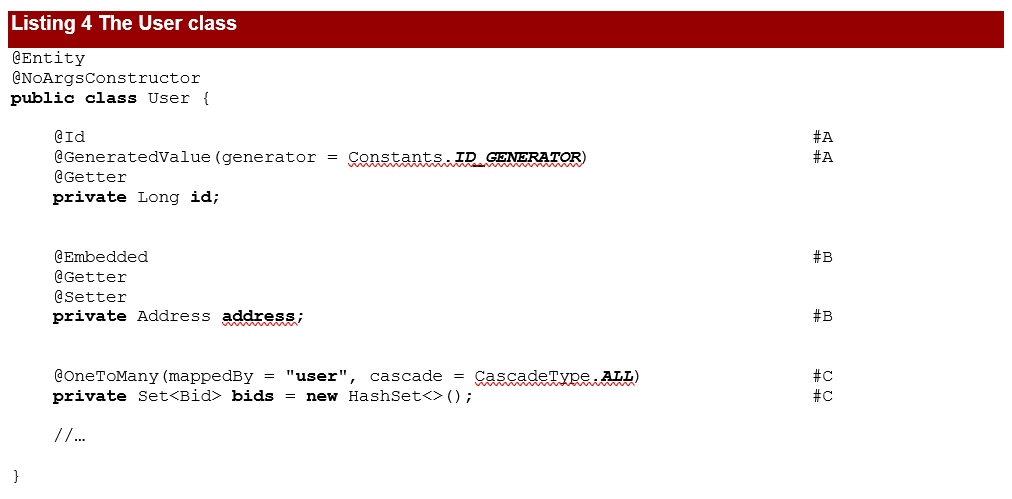
We have previously developed many examples of entities of this kind, we would like to point out just a few things:
#A The id field is an identifier generated by the Constants.ID_GENERATOR generator.
#B The address does not have its own identity, it is embeddable.
#C There is a one-to-many relationship between User and Bid, this one being mapped by the user field on the Bid side. CascadeType.ALL indicates that all operations will be propagated from the parent User to the child Bid.
The Address class does not have its own persistence identity, and it will be embeddable.

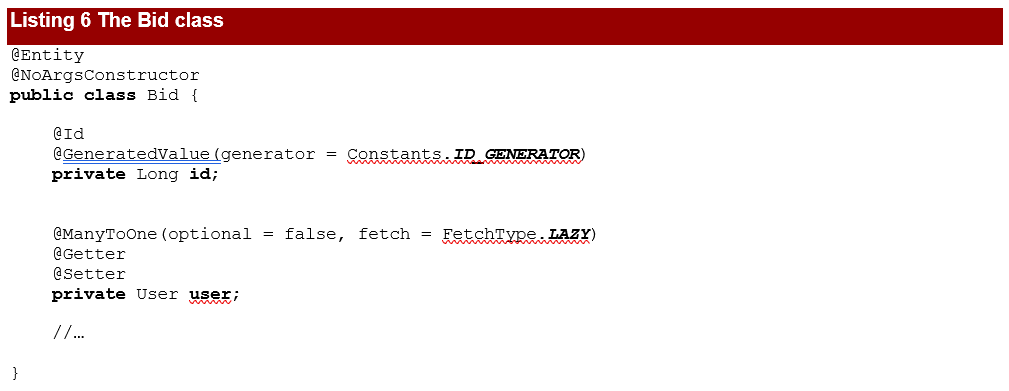
The Bid class will contain an id field having a similar generation strategy as for User. The relationship between Bid and User will be many-to-one, not optional and the fetch type will be lazy.
The UserRepository interface (listing 7) extends JpaRepository<User, Long>, managing the User entity, having ids of type Long. We’ll use this Spring Data JPA interface only to conveniently populate the database to test Querydsl on.

Creating the test data to query
To work with the database and to populate it, we’ll need a SpringDataConfiguration class and a GenerateUsers class. As we have previously used this approach repeatedly, we’ll only quickly review the capabilities of these classes.
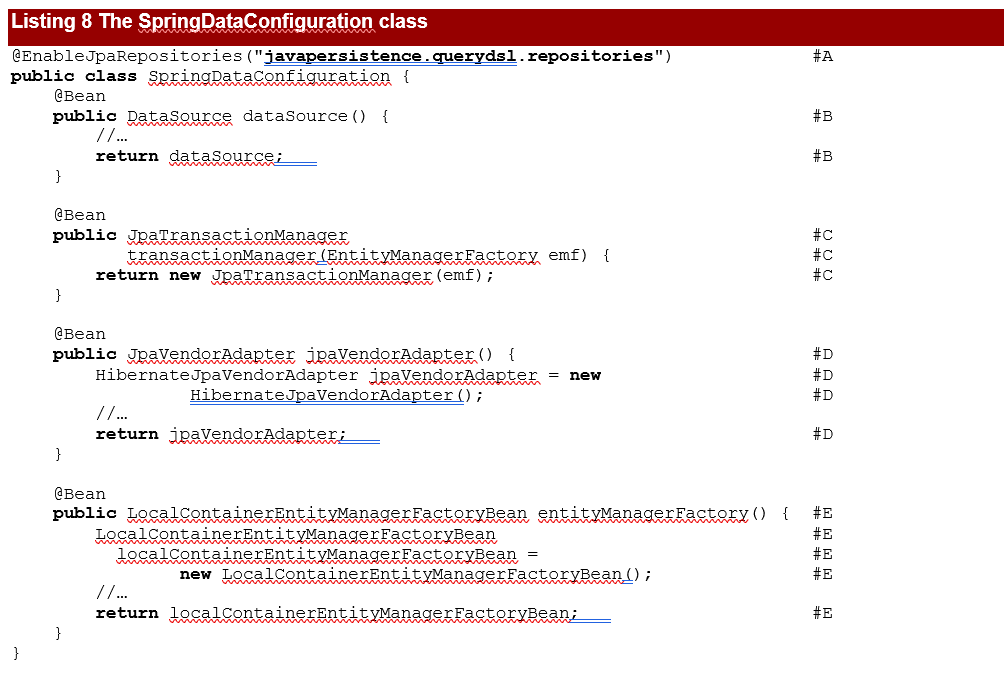
#A The @EnableJpaRepositories annotation will scan the package of the annotated configuration class for Spring Data repositories.
#B Create a data source bean to keep the JDBC properties: the driver, the URL of the database, the username, and the password.
#C Create a transaction manager bean based on an entity manager factory. Every interaction with the database should occur within transaction boundaries and Spring Data needs a transaction manager bean.
#D Create and configure a JPA vendor adapter bean that is needed by JPA to interact with Hibernate.
#E Create and configure a LocalContainerEntityManagerFactoryBean – this is a factory bean that produces an EntityManagerFactory.
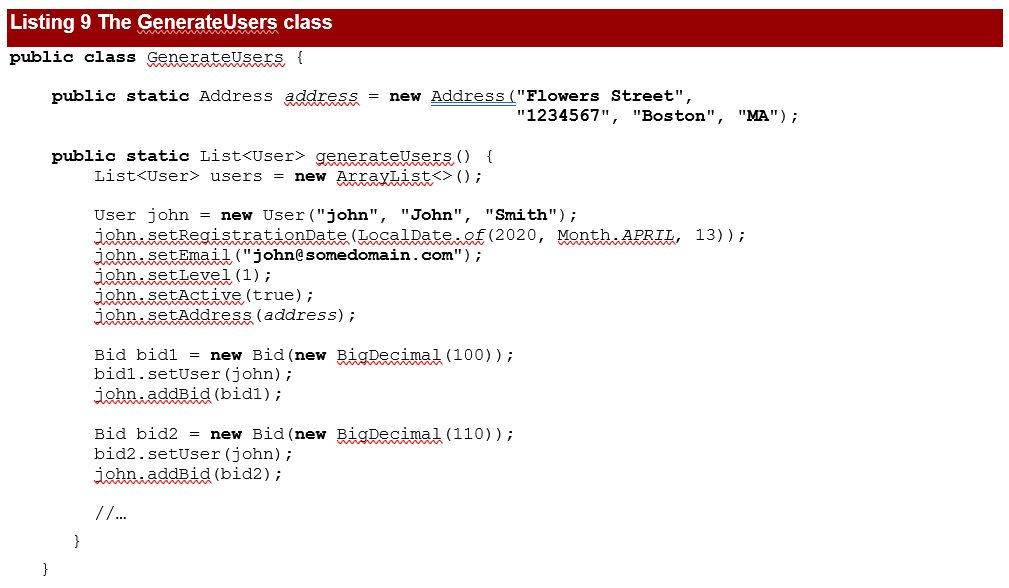
The GenerateUsers class contains the generateUsers method, which creates a list of users and their related bids.
Querying a database with Querydsl
As we mentioned, the Maven APT plugin will take care to generate the Q-types during the build process. According to the provided configuration (see listing 2), these sources will be generated into the target/generated-sources/java folder.
We’ll use these generated classes to query the database. First, we have to populate it, and for this purpose, we’ll use the UserRepository interface. We’ll also use an EntityManagerFactory and the created EntityManager to start working with a JPAQueryFactory and a JPAQuery. To work with queries, we’ll need a JPAQueryFactory instance, to be created using the constructor that takes an EntityManager argument. Then, JPAQueryFactory will create JPAQuery instances, to effectively query the database.
We'll extend the test using SpringExtension. This extension is used to integrate the Spring test context with the JUnit 5 Jupiter test.
Before executing all tests, we'll populate the database with previously generated users and their corresponding bids. Before executing each test, we'll create an EntityManager and start a transaction. Thus, every interaction with the database will occur within transaction boundaries. For the moment, we do not execute queries from inside this class. But as tests and queries will be immediately added (starting from listing 11), we’ll name our class QuerydslTest.

#A Extend the test using SpringExtension.
#B JUnit will create only one instance of the test class for executing all tests, instead of one instance per test. This way, we’ll be able to auto-wire the UserRepository field as an instance variable.
#C The Spring test context is configured using the beans defined in the previously presented SpringDataConfiguration class.
#D A UserRepository bean is injected by Spring through auto-wiring. It will be used to easily populate and cleanup the database
#E We initialize an EntityManagerFactory to talk to the database. This one will create the EntityManager that is needed in turn by the JPAQueryFactory.
#F Declare the EntityManager and the JPAQueryFactory needed for the application.
#G Populate the database with previously generated users and bids, to be used by the tests to create.
#H Create a JPAQueryFactory by passing an EntityManager as an argument of its constructor.
#I At the end of each test, commit the transaction and close the EntityManager.
#J At the end of the execution of all tests, cleanup the database.
